
Home energy audits are detailed checkups that show where your home is wasting energy and money. A typical professional audit costs about $150–$500 and can uncover changes that save roughly $10–$100+ per month on utility bills, depending on your home and current efficiency. Many homeowners see payback in 1–5 years through lower heating, cooling, and electric costs. The main tradeoff is that you must spend some time and money upfront, and savings are smaller if your home is already fairly efficient.
If your energy bills feel high, your home has hot or cold spots, or you’re planning upgrades, a home energy audit can be a smart financial tool. It helps you avoid guessing which improvements are worth it and which are a waste of money. This guide explains what an audit is, what it costs, how much you can realistically save, and how to decide whether your home needs one now.
Table of Contents
- What Is a Home Energy Audit?
- Why Your Energy Bills May Be Higher Than They Should Be
- Common Ways Homeowners Overspend on Energy
- What to Check First Before Paying for an Audit
- Quick Ways to Save Money Immediately
- Professional Home Energy Audit: Cost, Process, and Savings
- When Spending Money on Upgrades Actually Saves More Later
- Mistakes That Cost Homeowners Money
- DIY vs Professional Energy Audit: Which Is Right for You?
- Decision Guide: Does Your Home Need an Energy Audit Now?
- Frequently Asked Questions
- Summary and Next Steps
What Is a Home Energy Audit?
A home energy audit is a systematic review of how your home uses and loses energy. The goal is to find specific, measurable ways to lower your heating, cooling, and electric costs without sacrificing comfort.
There are two main types:
- DIY energy checkup: You walk through your home with a checklist, looking for obvious issues like drafts, old bulbs, and thermostat settings.
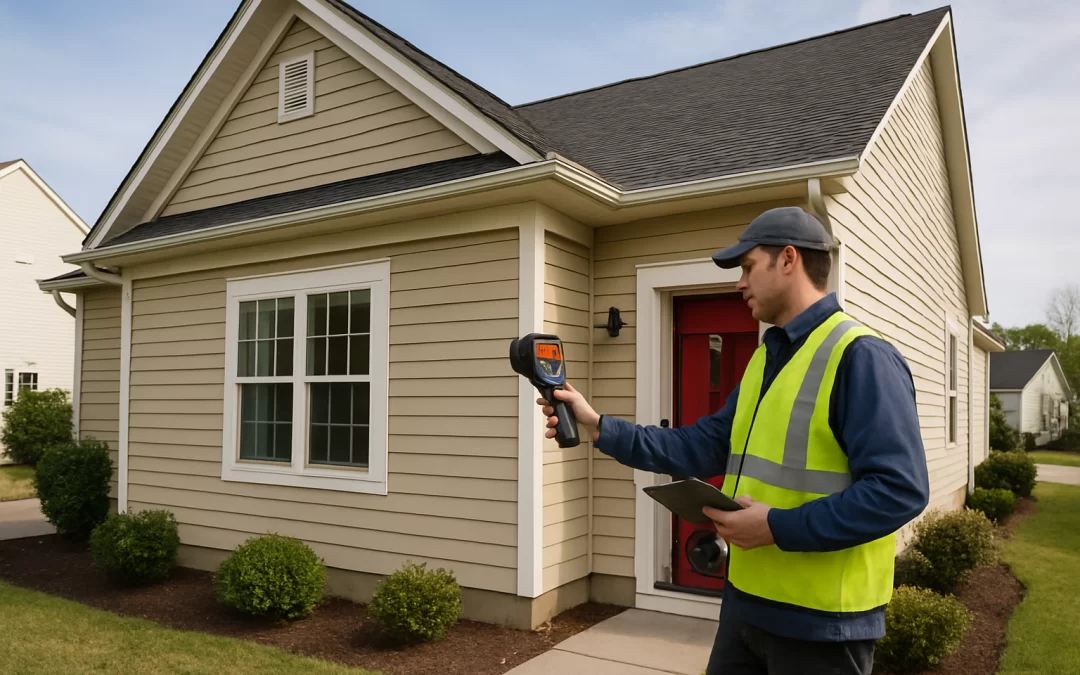
- Professional energy audit: A trained auditor uses tools (like blower doors and infrared cameras) to pinpoint hidden leaks, poor insulation, and inefficient equipment.
Instead of guessing which upgrades will save money, an audit gives you a prioritized list with estimated costs and savings for each improvement.
Why Your Energy Bills May Be Higher Than They Should Be
High energy bills usually come from a combination of small inefficiencies that add up over time. Many of these are invisible until someone measures them.
Common causes include:
- Air leaks: Gaps around windows, doors, attic hatches, and outlets let heated or cooled air escape.
- Poor insulation: Thin or missing insulation in the attic, walls, or basement makes your HVAC system work harder.
- Old heating and cooling equipment: Furnaces, boilers, and AC units lose efficiency as they age.
- Inefficient lighting and appliances: Older fridges, water heaters, and light bulbs use more electricity than newer, efficient models.
- Hot water waste: Long showers, leaky faucets, and uninsulated hot water pipes increase energy use.
- Behavior and settings: Thermostats set too high or too low, lights left on, and electronics running 24/7.
A home energy audit identifies which of these are actually costing you the most money in your specific home.
Common Ways Homeowners Overspend on Energy
Many people pay more than necessary on energy because they focus on the wrong fixes or delay simple changes.
Guessing Instead of Measuring
- Replacing windows when the real problem is air leaks and attic insulation.
- Buying a new HVAC system without sealing ducts or improving insulation first.
- Adding solar panels before reducing energy waste inside the home.
Ignoring Small, Ongoing Wastes
- Running old, inefficient refrigerators or freezers in the garage “just in case.”
- Leaving game consoles, cable boxes, and computers on all the time.
- Using space heaters to compensate for drafts instead of fixing the drafts.
Delaying Maintenance
- Skipping annual furnace or AC tune-ups, which can reduce efficiency and shorten equipment life.
- Not changing air filters regularly, forcing the system to work harder.
- Ignoring duct leaks that send conditioned air into attics or crawl spaces.
An energy audit helps you stop overspending by showing which issues are worth fixing now and which can wait.
What to Check First Before Paying for an Audit
Before you spend money on a professional home energy audit, it is smart to do a basic self-check. This can uncover easy savings and help you decide whether a full audit is necessary.
1. Review Your Utility Bills
- Compare your usage (kWh for electricity, therms or cubic feet for gas) month by month over the last year.
- Look for sudden jumps or consistently high usage compared to similar homes, if your utility provides that comparison.
- Note which seasons are most expensive: winter (heating), summer (cooling), or year-round (base electric use).
2. Check Thermostat Settings
- Heating: Aim for about 68°F when you are home and lower when you are asleep or away.
- Cooling: Aim for about 76–78°F when you are home and higher when away.
- If you do not have a programmable or smart thermostat, consider one; it is a low-cost upgrade with quick payback.
3. Look for Obvious Drafts and Gaps
- On a windy day, feel around windows, doors, and outlets on exterior walls for drafts.
- Check weatherstripping around doors and windows; if you can see daylight or feel air, it likely needs replacement.
- Inspect the attic hatch or pull-down stairs for gaps or missing insulation.
4. Inspect Lighting and Major Appliances
- Replace remaining incandescent or halogen bulbs with LEDs.
- Check the age of your refrigerator, water heater, and HVAC system; older units are usually less efficient.
- Unplug or retire extra fridges or freezers that are rarely used.
If these simple checks reveal multiple issues or your bills are still high after basic fixes, a professional audit becomes more likely to pay off.
Quick Ways to Save Money Immediately
You do not need a full audit to start lowering your energy bills. Many low-cost or no-cost steps can produce immediate savings.
Thermostat Adjustments
- Adjusting your thermostat by 1–2°F can save roughly 1–3% on heating or cooling costs.
- Use a programmable schedule so the system runs less when you are asleep or away.
Seal Simple Air Leaks
- Apply weatherstripping to drafty doors and windows.
- Use caulk around window frames, baseboards, and gaps where pipes or cables enter the home.
- Install foam gaskets behind outlet and switch plates on exterior walls.
Improve Hot Water Efficiency
- Set your water heater to about 120°F to reduce energy use and scald risk.
- Install low-flow showerheads and fix leaky faucets.
- Insulate the first 5–10 feet of hot water pipes leaving the water heater.
Lighting and Electronics
- Switch to LED bulbs in the most-used fixtures first.
- Use power strips to fully turn off TVs, game consoles, and office equipment when not in use.
- Enable “sleep” or “power save” modes on computers and monitors.
These steps can often save $10–$30 per month with little or no upfront cost, especially in homes that have not been updated in years.
Professional Home Energy Audit: Cost, Process, and Savings
Once you have handled the basics, a professional home energy audit can uncover deeper, hidden savings opportunities.
What Happens During a Professional Energy Audit?
While each provider is different, most professional audits include:
- Interview and bill review: The auditor asks about comfort issues, drafts, and reviews your past utility bills.
- Exterior and interior inspection: They check windows, doors, insulation levels, ductwork, and major equipment.
- Blower door test: A special fan depressurizes your home to measure how leaky it is and find air leaks.
- Infrared (thermal) imaging: A camera shows where heat is escaping through walls, ceilings, and around openings.
- Safety checks: They may test for carbon monoxide and proper venting of combustion appliances.
After the visit, you receive a report with recommended improvements, estimated costs, and projected savings.
How Much Does a Home Energy Audit Cost?
Typical price ranges for a professional audit:
- Basic audit: $150–$250 (visual inspection, basic tests, shorter report).
- Comprehensive audit: $300–$500+ (blower door, infrared imaging, detailed modeling and report).
Some utilities or local programs offer discounted or even free audits, especially if you follow through with recommended improvements. Always ask your utility company first before paying full price.
Realistic Savings from a Home Energy Audit
Savings depend heavily on your home’s current condition and how many recommendations you implement.
- Modest improvements only (basic sealing, LEDs, thermostat): Often $10–$30 per month.
- Moderate upgrades (air sealing, attic insulation, duct sealing): Commonly $20–$80 per month.
- Major upgrades (insulation, HVAC replacement, window improvements): Potentially $50–$150+ per month in inefficient homes.
In many cases, homeowners recover the cost of the audit itself within 1–3 years through lower bills, especially when combined with rebates or incentives.
Payback Period: When Does an Audit Make Financial Sense?
To judge whether an audit is worth it, consider:
- Audit cost: $150–$500 upfront.
- Expected monthly savings: Often $10–$100+ depending on your starting point and upgrades.
- Payback period: Audit cost divided by monthly savings.
Example: If you spend $300 on an audit and it leads to changes that save $30 per month, your payback is about 10 months. If you only save $10 per month, payback is about 2.5 years, which can still be reasonable if you plan to stay in the home.
When Spending Money on Upgrades Actually Saves More Later
A good energy audit does not just point out problems; it helps you prioritize upgrades that give the best financial return. Some improvements have especially strong payback.
High-Value Upgrades Often Identified by Audits
- Air sealing: Sealing leaks in attics, basements, and around penetrations is usually low cost with fast payback.
- Attic insulation: Adding insulation to reach recommended levels can significantly reduce heating and cooling costs.
- Duct sealing and insulation: Fixing leaky ducts can improve comfort and reduce wasted energy.
- Smart or programmable thermostats: Automating temperature setbacks can pay for itself quickly.
When Bigger Investments Make Sense
Larger projects can be worth it when:
- Your furnace, boiler, or AC is old, unreliable, or very inefficient.
- Your home has severe comfort problems (rooms that are always too hot or too cold).
- You plan to stay in the home long enough to enjoy the savings.
For example, combining an energy audit with broader energy efficiency improvements can help you choose upgrades that reduce monthly utility bills and increase comfort, rather than spending on cosmetic changes that do not lower costs.
Typical Payback Ranges for Common Upgrades
These are general estimates; your actual results will vary by climate, energy prices, and home condition:
- Air sealing and weatherstripping: Payback often within 1–3 years.
- Attic insulation upgrades: Payback commonly 3–7 years.
- Duct sealing: Payback around 3–6 years, sometimes faster in very leaky systems.
- High-efficiency furnace or AC replacement: Payback 7–15 years, depending on how inefficient your current system is.
- Window replacement: Often 15+ years or more; usually a comfort and appearance upgrade more than a pure money saver.
Mistakes That Cost Homeowners Money
Even with good intentions, it is easy to waste money on the wrong energy upgrades. Avoiding these common mistakes can protect your budget.
1. Replacing Windows Too Soon
New windows are expensive and often do not deliver quick energy savings. In many homes, sealing leaks and improving insulation gives a much better return than full window replacement.
2. Oversizing New HVAC Equipment
Bigger is not always better. Oversized furnaces and AC units cycle on and off more frequently, wasting energy and reducing comfort. An energy audit can help size equipment correctly based on your home’s actual needs.
3. Ignoring the Building Envelope
Upgrading equipment without fixing air leaks and insulation is like buying a better heater for a tent with holes. You pay for more capacity instead of reducing the need in the first place.
4. Chasing Gadgets Instead of Fundamentals
Smart plugs, fancy thermostats, and new tech can help, but they do not replace basic steps like sealing leaks, insulating properly, and maintaining equipment. Focus on the biggest sources of waste first.
5. Not Using Available Rebates and Incentives
Many utilities and local programs offer rebates for audits, insulation, HVAC upgrades, and more. Skipping these can mean leaving hundreds or even thousands of dollars on the table.
DIY vs Professional Energy Audit: Which Is Right for You?
Choosing between a DIY checkup and a professional home energy audit depends on your budget, your home’s condition, and how deep you want to go.
DIY Energy Checkup: Pros and Cons
Pros:
- Low or no cost.
- You can do it on your own schedule.
- Catches obvious issues like drafts, old bulbs, and thermostat problems.
Cons:
- No blower door or infrared imaging, so hidden leaks and insulation gaps may be missed.
- No professional modeling of savings or prioritized report.
- Easier to underestimate or overlook issues.
Professional Energy Audit: Pros and Cons
Pros:
- Comprehensive testing and diagnostics.
- Clear, prioritized list of improvements with estimated costs and savings.
- Helps you avoid spending on low-value upgrades.
- May be required to qualify for some rebates or financing programs.
Cons:
- Upfront cost of $150–$500.
- Requires scheduling and time at home during the visit.
- Savings depend on whether you actually follow through on recommendations.
Which Option Fits Your Situation?
- Consider DIY first if your bills are only slightly high, your home is relatively new, or your budget is tight.
- Consider a professional audit if your bills are significantly higher than similar homes, you have comfort problems, or you are planning major upgrades.
- If you are already planning a large project (like a new HVAC system or major insulation work), a professional audit can help you size and target those investments correctly.
Decision Guide: Does Your Home Need an Energy Audit Now?
Use this simple framework to decide whether a home energy audit is worth doing right away.
Signs You Should Schedule an Audit Soon
- Your energy bills feel high compared to neighbors or similar homes.
- You have rooms that are always too hot or too cold.
- You feel drafts around windows, doors, or floors.
- Your home is older (20+ years) and has never had an energy assessment.
- You are planning to replace your furnace, AC, or do major renovations.
When You Might Wait or Start with DIY
- Your home is newer and built to recent energy codes.
- Your bills are average and you do not notice comfort issues.
- You have already done major upgrades (insulation, air sealing, efficient HVAC) in the last few years.
- Your budget is very limited right now; start with low-cost DIY steps first.
Quick Fix vs Long-Term Investment
- Quick fixes: Thermostat changes, LED bulbs, basic weatherstripping, and hot water adjustments can be done immediately with little cost.
- Long-term investments: Insulation, duct sealing, and equipment upgrades require more planning but can significantly reduce long-term costs.
Think of a home energy audit as a planning tool. It helps you decide which long-term investments are worth making and when, so you do not waste money on low-impact projects.
Frequently Asked Questions
How much does a home energy audit usually save?
Most homeowners who act on audit recommendations see savings in the range of $10–$100+ per month, depending on how inefficient the home was to start. The biggest savings usually come from air sealing, insulation, and fixing duct leaks rather than from small gadgets.
Is a home energy audit worth it for a newer home?
For homes built to modern energy codes, savings from an audit may be smaller, but it can still be useful if you have comfort issues or unusually high bills. In many newer homes, a basic DIY checkup plus targeted fixes may be enough unless you suspect a specific problem.
How long does a professional energy audit take?
Most professional audits take 2–4 hours on-site, depending on the size and complexity of your home. You will usually receive the full report within a few days after the visit.
Can I do my own home energy audit?
You can perform a basic DIY energy checkup to find obvious issues like drafts, poor thermostat settings, and inefficient lighting. However, you will not have access to blower door tests or infrared imaging, so a professional audit is better for uncovering hidden problems and estimating savings.
Will a home energy audit lower my bills immediately?
The audit itself does not lower your bills; the savings come from the improvements you make based on the report. Some changes, like thermostat adjustments and weatherstripping, can reduce costs in the very next billing cycle.
Do I need an energy audit before making major upgrades?
You do not have to, but it is often a smart financial move. An audit can help you size new HVAC equipment correctly, decide whether insulation or air sealing should come first, and avoid spending thousands on upgrades that do not significantly reduce your bills.
Summary and Next Steps
A home energy audit is a focused way to find out where your home is wasting energy and how to fix it cost-effectively. For $150–$500, a professional audit can identify changes that may save $10–$100+ per month, with typical payback in 1–5 years depending on your home and the upgrades you choose.
Start with simple, low-cost steps: adjust your thermostat, seal obvious drafts, switch to LEDs, and review your utility bills. If your bills are still high, your home is older, or you are planning major upgrades, consider a professional audit to guide your next moves and avoid costly guesswork.
Taking a few practical steps now can reduce your monthly bills and make your home more comfortable without major disruption. When it makes financial sense, use a home energy audit to plan larger improvements so your money goes into upgrades that truly pay you back over time. By focusing on proven, high-impact changes and avoiding common mistakes, you can steadily lower your home’s operating costs and keep more of your budget for other priorities.