
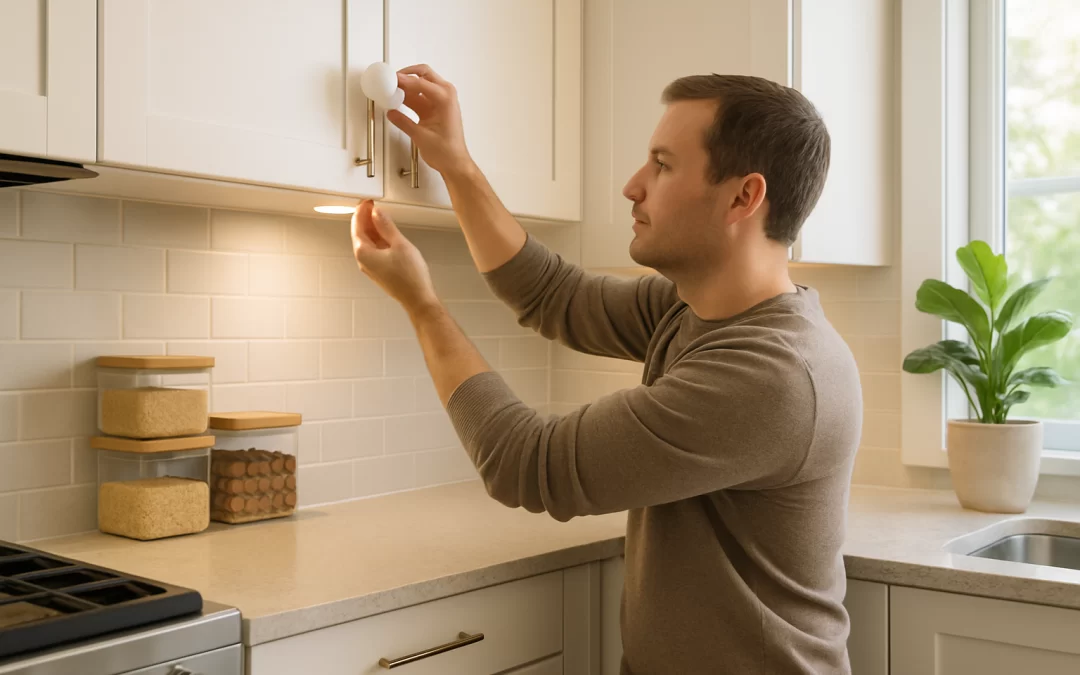
How Small Kitchen Upgrades Can Save You Money Over Time: Energy, Water & Maintenance Tips
Small kitchen upgrades can cut your monthly utility and maintenance costs by $15–$75, mainly through lower electricity, gas, and water use. Simple changes like switching to LED bulbs, fixing leaky faucets, and using smart power strips often pay for themselves within a year. Bigger upgrades, like an efficient dishwasher or fridge, can take 3–7 years to pay back but usually last 10–15 years. The tradeoff is that some upgrades require upfront cash and may not be worth it if you plan to move soon or rarely cook at home.
This guide is for homeowners and renters who want to lower kitchen costs without a full remodel. Kitchens are one of the most expensive rooms to run in a home because of constant appliance use, hot water, and lighting. By targeting a few high-impact areas, you can reduce bills, avoid repairs, and stretch the life of what you already own.
Table of Contents
- Causes of High Kitchen Energy, Water & Maintenance Costs
- Common Overspending Behaviors in the Kitchen
- What to Check First for Easy Savings
- Immediate Savings: Low-Cost or No-Cost Changes
- Long-Term Savings and Smart Kitchen Upgrades
- When Spending Money Now Saves More Later
- Common Costly Mistakes to Avoid
- When to Hire a Professional
- Decision Guide: What to Do Now vs. Later
- Frequently Asked Questions
- Summary & Next Steps
Causes of High Kitchen Energy, Water & Maintenance Costs
The kitchen is one of the biggest drivers of home utility bills because it combines heating, cooling, water use, and constant plug-in appliances. Even small inefficiencies add up when they run every day.
Main cost drivers include:
- Old or inefficient appliances – Older fridges, dishwashers, and ovens can use 20–50% more energy than newer efficient models.
- Always-on electricity use – Microwaves, coffee makers, and smart devices draw “standby” power even when not in active use.
- Hot water use – Dishwashing, handwashing, and cleaning with hot water raise both water and energy bills.
- Poor lighting efficiency – Halogen or incandescent bulbs in recessed cans and under-cabinet lights waste energy and generate heat.
- Heat buildup – Ovens and cooktops add heat, forcing your AC to work harder in warm months.
- Lack of basic maintenance – Dirty fridge coils, clogged faucet aerators, and worn door gaskets make equipment work harder and fail sooner.
Understanding these causes helps you target the upgrades that deliver the biggest savings for the lowest cost.
Common Overspending Behaviors in the Kitchen
Many kitchen costs come from habits rather than equipment. Changing a few routines can be as powerful as buying new appliances.
Common money-wasting behaviors include:
- Running half-full dishwashers – You pay for the same water and energy whether the load is half or fully loaded.
- Handwashing dishes with hot water – This often uses more hot water than an efficient dishwasher cycle.
- Leaving lights on – Under-cabinet and recessed lights left on for hours add up, especially with older bulbs.
- Overusing the oven – Heating a full-size oven for small meals wastes energy compared to a microwave, toaster oven, or air fryer.
- Not using lids when cooking – Boiling and simmering without lids takes longer and uses more gas or electricity.
- Ignoring small leaks – A slow-dripping faucet can waste hundreds of gallons of water per year.
- Overcooling the fridge – Setting the temperature too low wastes electricity without improving food safety.
These behaviors don’t feel expensive day to day, but over months and years they can cost hundreds of dollars.
What to Check First for Easy Savings
Before spending money on upgrades, look for simple issues that may be quietly raising your bills. A quick inspection can reveal several low-cost fixes.
1. Check Appliance Age and Efficiency
- Find the manufacture date on your fridge, dishwasher, and range (usually on a label inside the door or on the back).
- Appliances older than 10–15 years are often much less efficient than current models.
- Look for energy labels or model numbers you can search online to compare typical energy use.
2. Inspect for Leaks and Drips
- Check the kitchen faucet for drips when off and leaks under the sink.
- Look at the dishwasher connection and supply lines for dampness or water stains.
- Watch for signs of slow leaks: warped cabinet bottoms, musty smells, or discoloration.
3. Evaluate Lighting
- Note how many bulbs you have in recessed cans, pendants, and under-cabinet fixtures.
- Check if they are incandescent, halogen, CFL, or LED (it’s usually printed on the bulb).
- Older bulb types are prime candidates for quick, low-cost savings.
4. Check Fridge and Freezer Settings
- Use a simple fridge thermometer to check temperatures.
- Ideal settings: fridge around 37–40°F (3–4°C), freezer around 0°F (-18°C).
- Colder than this wastes energy without keeping food noticeably fresher.
5. Look at Ventilation and Heat
- Turn on your range hood and feel if it’s pulling air strongly.
- If your kitchen gets very hot when cooking, your AC may be working overtime.
- Poor ventilation can also shorten the life of cabinets and finishes due to moisture and grease buildup.
These checks cost nothing but can reveal where small upgrades will have the biggest payoff.
Immediate Savings: Low-Cost or No-Cost Changes
Some of the best kitchen savings come from changes you can make in a weekend with little or no money. These won’t transform your kitchen’s look, but they can noticeably lower your bills.
1. Switch to LED Kitchen Lighting
- Upfront cost: $2–$6 per bulb; $20–$60 to convert a typical kitchen.
- Monthly savings: $3–$10 depending on how often lights are used.
- Payback period: Often 6–18 months.
Replacing incandescent or halogen bulbs with LEDs cuts lighting energy use by about 70–80%. LEDs also produce less heat, which slightly reduces cooling costs in warm weather. For a deeper breakdown of lighting savings and payback, see this guide on how much you can save by switching to energy-efficient lighting.
2. Use the Dishwasher Efficiently
- Upfront cost: $0–$20 (for a new high-efficiency detergent or rinse aid, if needed).
- Monthly savings: $3–$15 vs. frequent handwashing with hot water.
- Payback period: Immediate to 2 months.
Run only full loads, use “eco” or “energy saver” cycles, and skip heated dry when possible. Let dishes air-dry by opening the door at the end of the cycle. Modern dishwashers typically use less water and energy per load than washing by hand with hot water.
3. Fix Faucet Drips and Install an Aerator
- Upfront cost: $5–$25 for a new aerator or basic faucet repair parts.
- Monthly savings: $2–$10 on water and hot water heating.
- Payback period: 1–6 months.
A dripping faucet can waste dozens of gallons per month. A low-flow aerator mixes air with water, reducing flow while maintaining good pressure for rinsing and washing.
4. Adjust Fridge and Freezer Temperatures
- Upfront cost: $0–$10 for a thermometer if you don’t have one.
- Monthly savings: $1–$5, depending on how overcooled your fridge was.
- Payback period: Immediate to 3 months.
Setting your fridge and freezer to recommended temperatures reduces compressor run time. Also, keep the fridge reasonably full (but not packed) so it maintains temperature more efficiently.
5. Change Cooking Habits
- Upfront cost: $0.
- Monthly savings: $3–$15 on gas or electricity.
- Payback period: Immediate.
For small meals, use a microwave, toaster oven, or air fryer instead of the full oven. Use lids on pots, match pot size to burner size, and turn off burners a few minutes early to use residual heat. In hot weather, cook earlier in the day or use smaller appliances to reduce AC load.
Long-Term Savings and Smart Kitchen Upgrades
Some upgrades require more money upfront but can deliver steady savings and better performance for years. These are worth considering if you plan to stay in your home for a while or if your current equipment is near the end of its life.
1. Energy-Efficient Refrigerator
- Upfront cost: $800–$2,000 for a mid-range efficient model.
- Monthly savings: $5–$15 vs. a 15+ year-old fridge.
- Payback period: Roughly 5–10 years, depending on usage and local energy rates.
The fridge runs 24/7, so even small efficiency improvements add up. Look for models with good energy ratings, proper size for your household (oversized fridges waste energy), and features you’ll actually use. If your current fridge is under 10 years old and working well, the savings from replacing it early may be modest.
2. Efficient Dishwasher
- Upfront cost: $400–$1,200 installed, depending on brand and features.
- Monthly savings: $3–$10 vs. an older, water-hungry model.
- Payback period: About 4–8 years.
Newer dishwashers use less water and energy per cycle and often clean better, reducing the need to pre-rinse dishes. If your current dishwasher is leaking, noisy, or leaving dishes dirty, upgrading can save on both utilities and future repair costs.
3. Induction or More Efficient Cooktop
- Upfront cost: $700–$2,000+ for an induction cooktop, plus possible electrical work.
- Monthly savings: $3–$10 vs. older electric coil or inefficient gas use.
- Payback period: 7–15+ years, often more about comfort and performance than pure savings.
Induction cooktops heat faster and more efficiently, with less wasted heat in the kitchen. This can reduce both cooking energy and cooling costs. However, the financial payback is slower, so this upgrade makes the most sense if you cook frequently and value the performance and safety benefits.
4. Better Kitchen Insulation and Sealing
- Upfront cost: $100–$1,000+ depending on whether you’re sealing gaps, adding weatherstripping, or improving wall/ceiling insulation.
- Monthly savings: $5–$30 on heating and cooling, especially if your kitchen has exterior walls or large windows.
- Payback period: 2–8 years.
Reducing drafts and improving insulation around the kitchen helps keep the space more comfortable and reduces the load on your HVAC system. For a broader look at how insulation affects your bills, see this guide on whether your insulation is costing you money.
5. Smart Plugs and Power Strips
- Upfront cost: $15–$50 per smart strip or plug.
- Monthly savings: $1–$5 by cutting standby power to small appliances.
- Payback period: 1–4 years.
Smart power strips can automatically cut power to devices like coffee makers, microwaves, and chargers when not in use. The savings are modest but add up over time, especially if you have many always-on gadgets.
When Spending Money Now Saves More Later
Not every upgrade is about immediate bill reductions. Some spending helps you avoid bigger repair or replacement costs down the road.
1. Replacing Failing Appliances Before They Break
- Upfront cost: Varies by appliance; often $400–$2,000.
- Savings: Avoid emergency replacement, rush fees, and potential water damage; plus ongoing energy savings.
- Best time: When an appliance is 10–15+ years old and showing signs of failure.
Waiting until a fridge or dishwasher fails completely can force you into a rushed, expensive purchase. Planning a replacement lets you shop sales, choose an efficient model, and avoid damage from leaks or spoiled food.
2. Addressing Small Leaks and Moisture Early
- Upfront cost: $50–$300 for minor plumbing repairs; more if cabinets or flooring are affected.
- Potential avoided cost: $1,000+ in water damage, mold remediation, and cabinet replacement.
- Best time: As soon as you notice dampness, stains, or musty smells.
Moisture problems rarely stay small. Fixing them early protects your cabinets, flooring, and even structural elements, saving thousands over time.
3. Smart Layout and Storage Changes
- Upfront cost: $200–$3,000+ depending on whether you’re adding pull-out shelves, reorganizing, or doing minor carpentry.
- Savings: Indirect, through less food waste, fewer duplicate purchases, and less wear on doors and drawers.
- Best time: During minor remodels or when updating cabinets.
Improved storage and layout make it easier to see and use what you have, reducing food waste and unnecessary purchases. For ideas that maximize space without a full gut job, see these small kitchen remodel ideas.
Common Costly Mistakes to Avoid
Some well-intentioned upgrades don’t pay off or even increase your costs. Avoiding these mistakes can save you from wasted spending.
- Over-remodeling for the neighborhood – A high-end kitchen in a modest area may not return its cost when you sell.
- Choosing oversized appliances – Extra-large fridges and ranges cost more to buy and run, without real benefits for small households.
- Ignoring ventilation – Skipping a proper range hood or using a weak one can lead to grease buildup, odors, and moisture damage.
- DIY gas or major electrical work – Mistakes here can be dangerous and expensive to fix.
- Buying gadgets you rarely use – Specialty appliances (like large stand mixers or niche cookers) that sit unused still take up space and sometimes draw standby power.
- Focusing only on looks – New countertops and backsplashes look great but don’t lower your bills; balance aesthetics with functional upgrades.
If you’re considering a larger remodel, it’s worth understanding common budget pitfalls. This guide to kitchen remodel mistakes that increase costs can help you avoid overspending.
When to Hire a Professional
Some kitchen upgrades are safe and realistic for DIY, while others are better left to licensed pros. Knowing the difference protects both your wallet and your safety.
DIY-Friendly Tasks
- Replacing light bulbs with LEDs.
- Installing faucet aerators and basic shower or sink filters.
- Adjusting fridge temperature settings and cleaning coils (after unplugging).
- Adding smart plugs or basic power strips.
- Minor caulking around sinks and backsplashes.
Tasks for a Professional
- Gas line work – Installing or moving gas ranges, ovens, or cooktops.
- Major electrical changes – Adding new circuits, upgrading panels, or hardwiring new appliances.
- Plumbing changes – Moving sinks, dishwashers, or fixing hidden leaks inside walls.
- Structural changes – Removing walls, adding islands, or changing window/door openings.
Hiring a pro costs more upfront but can prevent code violations, safety hazards, and expensive rework later. For bigger projects, it’s helpful to understand typical price ranges; this overview of the average cost of kitchen remodeling can give you a realistic starting point.
Decision Guide: What to Do Now vs. Later
Use this section to decide which kitchen upgrades make sense for you right now, and which can wait.
Do Now: Quick Fixes with Fast Payback
Prioritize these if you want immediate savings with low risk:
- Switch all kitchen bulbs to LEDs.
- Fix dripping faucets and install low-flow aerators.
- Adjust fridge and freezer temperatures to recommended levels.
- Change habits: run full dishwasher loads, use lids when cooking, and favor smaller appliances for small meals.
Consider Soon: Moderate Investments
These make sense if you plan to stay in your home for at least a few years:
- Replace a 10–15+ year-old fridge or dishwasher that’s still working but inefficient.
- Add smart power strips for clusters of small appliances.
- Improve sealing and insulation around windows, doors, and exterior walls near the kitchen.
Plan for Later: Larger Upgrades
These are best timed with a broader remodel or when equipment fails:
- Upgrading to an induction cooktop or more efficient range.
- Reconfiguring layout, cabinets, or adding an island.
- Replacing windows or doing major insulation work in the kitchen area.
DIY vs. Professional
- DIY if the task is simple, low-risk, and you can follow clear instructions (bulb changes, aerators, basic sealing).
- Hire a pro for anything involving gas, major electrical work, hidden plumbing, or structural changes.
Cheap Fix vs. Full Upgrade
- Choose the cheap fix if the appliance is under 10 years old and the issue is minor (like a seal or small part).
- Choose the upgrade if the appliance is 10–15+ years old, repairs are frequent, or energy use is clearly high.
- Factor in how often you cook and how long you plan to stay in the home; heavy use and long stays favor better upgrades.
Frequently Asked Questions
How much can I realistically save with small kitchen upgrades?
Most households can save $15–$75 per month by combining small upgrades and habit changes: LEDs, fixing leaks, efficient dishwashing, and smarter cooking. The exact amount depends on how often you cook, your local utility rates, and how inefficient your current setup is. Over a year, that can add up to $180–$900 in lower bills.
Which kitchen upgrade has the fastest payback?
Switching to LED bulbs and fixing faucet leaks usually pay back within a few months. Adjusting fridge temperatures and using the dishwasher efficiently can also deliver immediate savings with no real cost. Larger upgrades like new appliances take longer but can still be worthwhile over their lifespan.
Is it worth replacing a working fridge or dishwasher just to save energy?
It depends on the age and efficiency of your current appliance. If it’s under 10 years old and working well, the energy savings from replacing it early are usually small. If it’s 15+ years old, noisy, or needing frequent repairs, a new efficient model can lower bills and reduce the risk of sudden failure.
Do small appliances like air fryers and toaster ovens really save money?
Yes, for small meals they often use less energy than heating a full-size oven, and they add less heat to your kitchen. If you regularly cook small portions, using these appliances can trim your energy use. However, buying multiple gadgets you rarely use won’t save money overall.
Can kitchen insulation and sealing really make a difference?
Improving insulation and sealing around the kitchen can reduce drafts, keep temperatures more stable, and ease the load on your heating and cooling system. The impact is bigger if your kitchen has exterior walls, large windows, or is currently drafty. While not as visible as new cabinets, these upgrades can quietly save money year-round.
How do I know if a kitchen remodel will pay off financially?
From a savings standpoint, focus on upgrades that reduce energy, water, and maintenance costs rather than purely cosmetic changes. From a resale standpoint, moderate, well-planned remodels often return a good portion of their cost, while very high-end projects may not. Reviewing detailed cost and ROI guides before starting can help you avoid overspending.
Summary & Next Steps
Small kitchen upgrades—like LED lighting, fixing leaks, adjusting appliance settings, and smarter cooking habits—can cut your monthly bills with little or no upfront cost. Over time, targeted investments in efficient appliances, better insulation, and smart power management can add steady, long-term savings and reduce the risk of expensive repairs.
To move forward:
- Start with a quick audit: lighting, leaks, fridge settings, and your daily habits.
- Tackle the fastest payback items first: LEDs, aerators, and behavior changes.
- Plan for future upgrades as appliances age, focusing on efficiency and reliability.
- If you’re considering a larger project, review realistic budgets and common pitfalls before committing.
By making a few smart, affordable changes now and planning bigger upgrades carefully, you can turn your kitchen into a space that not only works better but quietly saves you money every month.