
Is Your Insulation Costing You Money? Signs of Poor Insulation, Energy Loss & How to Improve It
Poor insulation can quietly add $30–$150 per month to your energy bills by letting heated or cooled air escape. Common signs include drafty rooms, uneven temperatures, ice dams, and a furnace or AC that runs constantly. Improving insulation often pays for itself in 3–7 years, and faster in very hot or cold climates. The main tradeoff is the upfront cost and some disruption during installation, especially in attics and walls.
This guide is for homeowners and renters who suspect their home is “leaking money” through the walls, attic, or windows but don’t know where to start. Energy prices keep rising, so every bit of wasted heating or cooling adds up over time. By spotting the signs of poor insulation and choosing the right fixes, you can cut bills, improve comfort, and avoid spending on upgrades that don’t pay off.
Table of Contents
- Key Signs Your Insulation Is Costing You Money
- Main Causes of High Energy Costs from Poor Insulation
- Common Overspending Behaviors to Avoid
- What to Check First (Simple Home Checks)
- Immediate, Low-Cost Ways to Save
- Long-Term Insulation Upgrades & Savings
- When Spending More Now Saves You More Later
- Common Costly Insulation Mistakes
- When to Hire a Professional (and What It Costs)
- How to Decide: Now vs Later, DIY vs Pro, Quick Fix vs Upgrade
- Frequently Asked Questions
- Summary & Next Steps
Key Signs Your Insulation Is Costing You Money
You don’t need special tools to spot many insulation problems. Pay attention to comfort issues and your utility bills.
Comfort and Temperature Clues
- Rooms that are always too hot or too cold compared to the rest of the house.
- Drafts near windows, doors, outlets on exterior walls, or along baseboards.
- Cold floors over garages, crawlspaces, or unheated basements.
- Temperature swings of more than 3–4°F between rooms or between floors.
Energy Bill and System Clues
- High heating or cooling bills compared to neighbors with similar-size homes.
- Furnace or AC runs constantly and still struggles to keep up.
- Frequent need to “crank up” the thermostat just to feel comfortable.
Visible Signs Around the House
- Little or no insulation visible in the attic, or insulation that looks thin, patchy, or dirty.
- Ice dams on the roof in winter (ice buildup at the roof edge while the upper roof is bare).
- Condensation or mold on walls, ceilings, or around windows.
If you notice several of these signs, your insulation is likely wasting energy and money every month.
Main Causes of High Energy Costs from Poor Insulation
High energy bills usually come from a mix of weak insulation and air leaks, not just one problem area.
1. Under-Insulated Attic
- Heat rises, so an attic with thin or missing insulation is one of the biggest sources of energy loss.
- Many older homes have only a few inches of attic insulation, far below modern recommendations.
- Impact: Can add $20–$80 per month to heating and cooling costs in many climates.
2. Air Leaks Around the Home
- Gaps around windows, doors, plumbing, wiring, and recessed lights let conditioned air escape.
- Even small cracks add up to the equivalent of leaving a window open year-round.
- Impact: Often 10–25% of heating and cooling costs are from air leaks alone.
3. Poorly Insulated Walls and Floors
- Older homes may have little or no insulation in exterior walls.
- Floors over garages or crawlspaces can be major cold spots in winter.
- Impact: Adds to discomfort and forces your system to run longer.
4. Old or Damaged Insulation
- Insulation can be compressed, moved, or damaged by moisture, pests, or previous work.
- Wet insulation loses most of its insulating value and can lead to mold.
- Impact: You pay for insulation that no longer does its job.
Common Overspending Behaviors to Avoid
Even with imperfect insulation, some habits make your bills higher than they need to be.
- Overheating or overcooling the whole house instead of targeting problem rooms.
- Ignoring drafts and just turning up the thermostat to “power through” discomfort.
- Running space heaters or window AC units constantly to fix one bad room.
- Delaying small fixes like weatherstripping or caulking that cost little but save every month.
- Upgrading HVAC before insulation – a bigger system still wastes energy if the home leaks.
These behaviors can easily add $20–$100 per month to your bills without actually solving the root problem.
What to Check First (Simple Home Checks)
Before spending money, do a quick home “energy walk-through.” You can do most of this in under an hour.
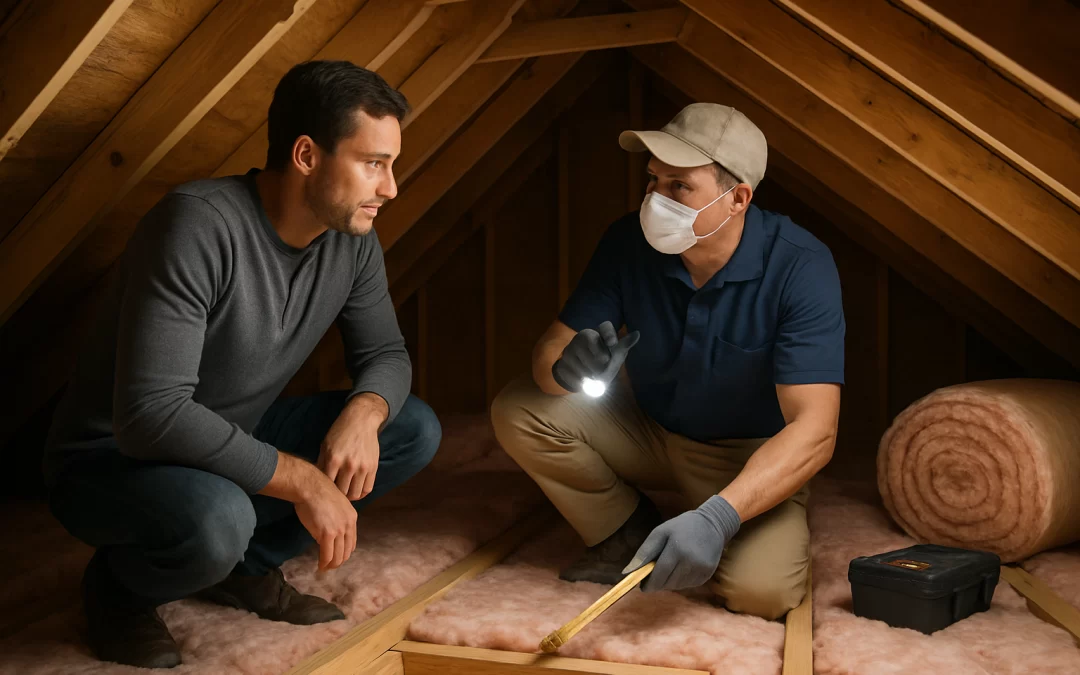
1. Attic Check
- Look for even coverage of insulation across the entire attic floor.
- If you can easily see the tops of joists (the wooden beams), you likely need more insulation.
- Check for dark, dirty spots in insulation – these often show air leaks.
2. Draft Check
- On a windy day, run your hand around:
- Window and door frames
- Electrical outlets on exterior walls
- Baseboards and where walls meet floors
- If you feel air movement, you have leaks that are costing you money.
3. Utility Bill Review
- Compare your usage (kWh for electricity, therms or cubic feet for gas) to the same month last year.
- Look for unexplained increases not tied to rate hikes or extreme weather.
- If possible, compare with neighbors or similar homes in your area.
4. Comfort Map
- Make a quick list of rooms that are:
- Always cold in winter
- Always hot in summer
- Have cold floors or drafts
- This helps you target the worst areas first, instead of trying to fix everything at once.
Immediate, Low-Cost Ways to Save
You can often trim $10–$50 per month with simple, low-cost steps before doing major insulation work.
1. Seal Air Leaks
- Weatherstripping for doors and windows:
- Cost: $10–$50 in materials for several openings.
- Monthly savings: $5–$20.
- Payback: Often 1–6 months.
- Caulk gaps around window frames, baseboards, and where pipes or cables enter walls:
- Cost: $5–$30 in materials.
- Monthly savings: $5–$15.
- Payback: Usually under 1 year.
2. Simple Window Improvements
- Plastic window insulation kits in winter:
- Cost: $15–$40 for several windows.
- Monthly savings: $5–$25 in cold climates.
- Payback: 1–3 months of winter use.
- Thermal curtains or lined drapes:
- Cost: $30–$100 per window.
- Monthly savings: $5–$15 in extreme seasons.
- Payback: 1–3 years, plus comfort benefits.
3. Smart Thermostat Use
- Set back the temperature by 7–10°F at night or when you’re away.
- Smart thermostat:
- Cost: $100–$250 (often less with utility rebates).
- Monthly savings: $10–$30 for many households.
- Payback: 1–2 years, sometimes faster.
These steps don’t fix insulation itself, but they reduce how much energy you waste while you plan bigger upgrades.
Long-Term Insulation Upgrades & Savings
Major insulation improvements cost more upfront but can deliver steady savings for decades.
1. Attic Insulation Upgrade
- What it is: Adding blown-in or batt insulation to reach recommended levels.
- Typical cost:
- DIY materials: $500–$1,500 for an average home.
- Professional install: $1,500–$4,000, depending on size and region.
- Monthly savings: $20–$80 in many climates.
- Payback period: About 3–7 years, faster in very hot or cold areas.
- Best for: Homes where you can see attic joists or have uneven, thin insulation.
2. Air Sealing + Insulation Package
- What it is: A pro seals leaks (attic, basement, around penetrations) and adds insulation.
- Typical cost: $2,000–$6,000 for a whole-house approach.
- Monthly savings: $30–$100+ depending on home size and condition.
- Payback period: Roughly 4–8 years, sometimes less with rebates.
- Best for: Drafty older homes with high bills and comfort issues on multiple floors.
3. Wall Insulation (Existing Homes)
- What it is: Blown-in insulation added to wall cavities through small holes.
- Typical cost: $2,000–$5,000+ depending on home size and access.
- Monthly savings: $15–$50, more in cold climates.
- Payback period: Often 7–15 years.
- Best for: Older homes with little or no wall insulation and noticeable cold walls.
4. Basement and Crawlspace Insulation
- What it is: Insulating basement walls or crawlspace walls/ceilings and sealing vents.
- Typical cost: $1,500–$5,000 depending on size and method.
- Monthly savings: $10–$40, plus warmer floors and reduced moisture issues.
- Payback period: 5–12 years.
- Best for: Homes with very cold floors, musty basements, or exposed foundation walls.
Long-term upgrades are most worthwhile if you plan to stay in the home at least 5–10 years or want to improve resale value and comfort.
When Spending More Now Saves You More Later
Not every insulation project has the same financial payoff. In some cases, spending more upfront makes sense.
High-Return Situations
- Very poor existing insulation: If your attic is almost bare, upgrading is usually a clear win.
- Extreme climates: Very hot or cold regions see bigger monthly savings and faster payback.
- Bundling with other projects: If you’re already opening walls for a remodel, adding insulation is relatively cheap.
- Utility rebates and tax credits: These can cut your upfront cost by 10–50% and shorten payback.
Lower-Return or “Nice-to-Have” Situations
- Already well-insulated attic: Adding more may bring only small extra savings.
- Minor drafts only: A few small leaks might be better handled with caulk and weatherstripping.
- Short-term stay: If you plan to move in 1–3 years, focus on low-cost fixes with fast payback.
In general, the worse your current insulation and the higher your energy rates, the more worthwhile a bigger investment becomes.
Common Costly Insulation Mistakes
Avoiding these mistakes can save you from spending thousands with little benefit.
- Skipping air sealing: Adding insulation without sealing leaks first reduces its effectiveness.
- Blocking attic ventilation: Covering soffit vents with insulation can cause moisture and roof problems.
- Compressing insulation: Packing it too tightly reduces its insulating value.
- Ignoring moisture issues: Insulating over leaks or damp areas can trap moisture and cause mold.
- Choosing insulation only by price: The cheapest option isn’t always the best long-term value.
- Overspending on windows first: Replacing windows is expensive; in many homes, attic and air sealing save more per dollar.
If you’re planning a larger home upgrade, such as a kitchen remodel, it can be smart to coordinate insulation work while walls or ceilings are already open to avoid paying twice for labor. For example, if you’re reworking layouts or walls, understanding the true cost of a kitchen remodel by budget level can help you set aside funds for insulation and air sealing at the same time.
When to Hire a Professional (and What It Costs)
Some insulation work is DIY-friendly; other jobs are better handled by pros for safety, quality, and long-term performance.
Good DIY Candidates
- Adding batt insulation in accessible attics (with proper safety gear).
- Installing weatherstripping and caulking around windows and doors.
- Applying foam gaskets behind outlet and switch plates on exterior walls.
Best Left to Professionals
- Blown-in attic or wall insulation (requires equipment and knowledge of coverage).
- Spray foam insulation (chemical handling, ventilation, and proper thickness are critical).
- Complex air sealing in tight spaces, around chimneys, or near combustion appliances.
- Homes with moisture, mold, or pest issues that need to be addressed first.
Typical Professional Costs
- Home energy audit: $150–$600 (often partly rebated by utilities).
- Professional attic insulation: $1,500–$4,000.
- Whole-house air sealing and insulation package: $2,000–$6,000+.
While pro work costs more upfront, it often delivers better, more reliable savings and can help you avoid mistakes that are expensive to fix later.
How to Decide: Now vs Later, DIY vs Pro, Quick Fix vs Upgrade
Use these guidelines to decide what to do and when.
Do It Now If:
- Your winter or summer bills feel unreasonably high compared to similar homes.
- You have rooms that are uncomfortable most of the year.
- Your attic has visibly thin or patchy insulation.
- Utility rebates or tax credits are available and time-limited.
Can Likely Wait If:
- Your home is mostly comfortable with only minor drafts.
- Your bills are reasonable and you plan to move within a couple of years.
- You’re already planning a major remodel soon and can bundle insulation work then.
Quick Fix vs Long-Term Investment
- Quick fixes (low cost, fast payback):
- Weatherstripping and caulking
- Plastic window film and thermal curtains
- Smart thermostat and better thermostat settings
- Long-term investments (higher cost, bigger lifetime savings):
- Attic insulation upgrade
- Whole-house air sealing
- Wall, basement, or crawlspace insulation
DIY vs Professional
- Choose DIY if:
- You’re comfortable with basic tools and safety gear.
- The work is simple and accessible (like open attic spaces).
- You’re focusing on small, low-risk projects.
- Choose a professional if:
- You want a full-home assessment and clear savings estimates.
- You have complex issues (moisture, mold, very old home, or past DIY work).
- You’re investing several thousand dollars and want it done right the first time.
Frequently Asked Questions
How much can better insulation really save me each month?
Most homeowners see monthly savings of $20–$80 from a solid attic insulation and air sealing upgrade, depending on climate and home size. In very inefficient homes or extreme climates, savings can be higher. The more under-insulated you are now, the bigger the potential savings.
What’s the fastest payback insulation project?
Sealing air leaks with weatherstripping and caulk usually has the fastest payback, often within a few months. Adding attic insulation in a poorly insulated home is next, with many projects paying for themselves in 3–7 years. These upgrades also improve comfort, which is hard to put a price on.
Is it worth upgrading insulation if I plan to move soon?
If you’ll move within 1–3 years, focus on low-cost fixes with quick payback, like sealing leaks and improving thermostat use. Larger insulation projects may still help with resale value and buyer appeal, but the direct bill savings may not fully pay back before you move.
Should I replace windows or improve insulation first?
In most cases, it’s smarter financially to improve attic insulation and air sealing before replacing windows. Windows are expensive, and the energy savings per dollar spent are often lower than insulation upgrades. Consider window replacement mainly if your windows are failing, drafty, or part of a larger remodel.
How do I know if a contractor’s insulation quote is fair?
Get at least two or three quotes and ask each contractor to explain what areas they’ll treat, what materials they’ll use, and what savings you can realistically expect. Check reviews, ask about warranties, and see if they can coordinate with other projects, such as a kitchen remodel, to reduce overall disruption and cost. Comparing detailed scopes of work is more useful than comparing price alone.
Summary & Next Steps
Poor insulation and air leaks can quietly drain $30–$150 per month from your budget through higher heating and cooling bills. The biggest culprits are usually under-insulated attics and unsealed air leaks, especially in older homes.
Start with simple checks: look in your attic, feel for drafts, and review your energy bills. Tackle low-cost fixes like weatherstripping, caulking, and smarter thermostat use for immediate savings. Then, if your home is clearly under-insulated or uncomfortable, consider a targeted attic insulation upgrade or a whole-house air sealing and insulation package, especially if you plan to stay in the home for several years.
For many households, a thoughtful combination of quick fixes and smart upgrades can cut energy bills by 10–30% without overspending. Take one step this week—seal a draft, check your attic, or schedule an energy audit—to start keeping more of your money in your pocket instead of letting it escape through your walls and roof.