
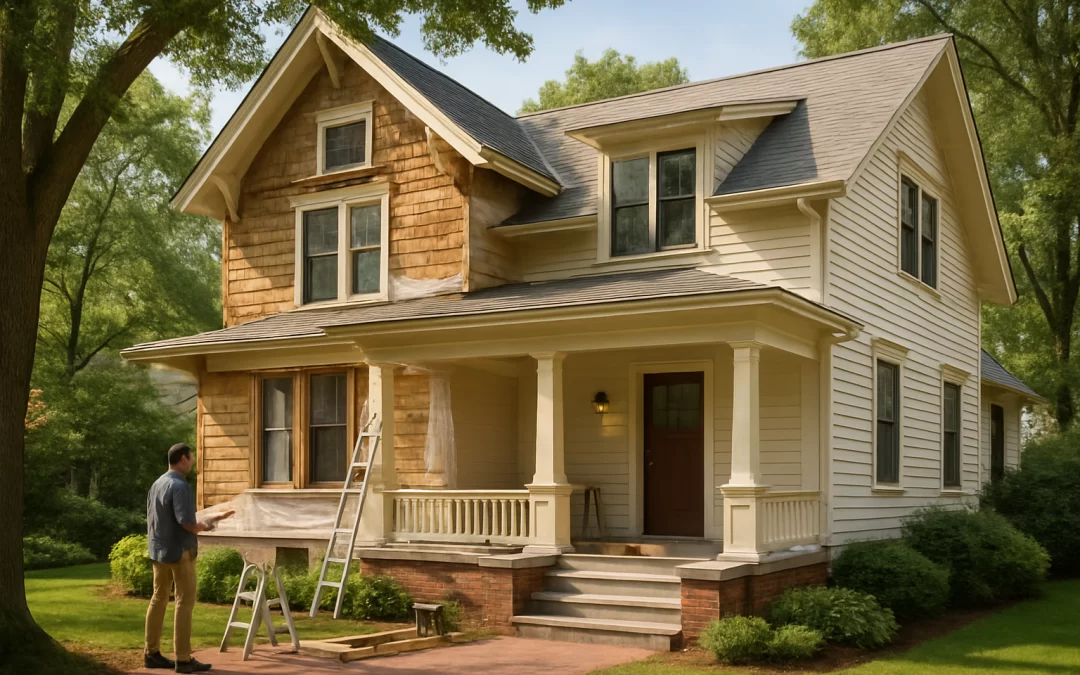
Renovation Ideas for Old Homes: How to Modernize Without Losing Their Character
Modernizing an old home without losing its charm means focusing on hidden upgrades (like insulation, wiring, and plumbing) while preserving visible character (like trim, doors, and floors). Many homeowners can cut energy and maintenance costs by $50–$250 per month with smart updates, especially in heating, cooling, and water use. The tradeoff is that some of the most valuable improvements are “invisible” and less exciting than cosmetic changes, even though they often deliver the best long-term savings.
This guide is for homeowners and renters in older houses who want to update safely and affordably while keeping original details. Older homes can be expensive to heat, cool, and maintain, and rushed renovations often erase character and overshoot the budget. By planning upgrades in the right order and knowing where to spend or save, you can protect your home’s history and your wallet at the same time.
Table of Contents
- Causes of High Costs in Older Homes
- Common Overspending Behaviors During Renovations
- What to Check First Before Renovating
- Immediate Savings: Low-Cost Updates That Pay Off Fast
- Long-Term Savings and Smart Upgrades
- When Spending More Now Saves You Later
- Common Costly Mistakes in Old-Home Renovations
- When to Hire a Professional Instead of DIY
- Decision Guide: Do Now vs Later, DIY vs Pro
- Frequently Asked Questions
- Summary and Next Steps
Causes of High Costs in Older Homes
Older homes often cost more to own and renovate because of hidden inefficiencies and outdated systems. Many were built before modern energy codes, so they leak air, waste heat, and use more water and electricity than necessary.
Typical cost drivers in old homes
- Poor insulation and air leaks: Drafty windows, uninsulated attics, and gaps around doors can add $50–$150 per month to heating and cooling bills.
- Old heating and cooling systems: Furnaces and boilers over 20 years old can be 20–40% less efficient than modern models.
- Outdated plumbing and wiring: Old pipes can leak or burst, and old electrical systems may not safely handle modern loads, leading to expensive emergency repairs.
- Deferred maintenance: Roofs, gutters, exterior paint, and foundations that have been ignored for years can turn into large, urgent expenses.
- Lead paint and asbestos: Hazardous materials require special handling and can increase renovation costs significantly.
These issues don’t just increase monthly bills; they also make cosmetic upgrades riskier. For example, installing a new kitchen over old plumbing can lead to costly tear-outs later if pipes fail.
Common Overspending Behaviors During Renovations
Many people overspend on old-home renovations by focusing on visible upgrades first and underestimating hidden problems. This can lead to paying twice for the same area when underlying issues eventually surface.
Where budgets often go off track
- Prioritizing “pretty” over “practical”: New cabinets, countertops, and fixtures before fixing insulation, wiring, or drainage.
- Changing layouts unnecessarily: Moving walls, plumbing, or staircases adds thousands in labor and permits with little financial return.
- Over-customizing finishes: High-end materials in every room can push costs up by 20–40% without adding equivalent resale value.
- Ignoring contingency: Not setting aside 10–20% of the budget for surprises, which are very common in older homes.
- DIY beyond skill level: Attempting complex electrical, structural, or plumbing work can lead to failed inspections and rework costs.
Being realistic about what your home needs versus what you want right now is one of the biggest money-savers in an old-home renovation.
What to Check First Before Renovating
Before you pick paint colors or new fixtures, you should understand the condition of your home’s structure and systems. This helps you avoid spending money on finishes that may need to be removed later for repairs.
Priority inspections and assessments
- Roof and gutters: Look for missing shingles, sagging areas, and overflowing or clogged gutters. Water damage is one of the most expensive problems in older homes.
- Foundation and drainage: Check for cracks, sloping floors, or water in the basement or crawlspace.
- Electrical system: Identify knob-and-tube wiring, overloaded panels, or lack of grounded outlets.
- Plumbing: Look for old galvanized pipes, slow drains, low water pressure, and signs of leaks. For cost expectations on serious issues like hard water damage, see the hard water damage repair cost guide.
- Insulation and air sealing: Check attic insulation depth and feel for drafts around windows, doors, and baseboards.
Suggested order of operations
- Address water management (roof, gutters, drainage).
- Fix structural and safety issues (foundation, electrical hazards, major plumbing problems).
- Improve energy efficiency (insulation, air sealing, basic HVAC upgrades).
- Then move on to cosmetic and layout changes.
Spending $300–$800 on inspections and basic assessments can easily prevent $5,000–$20,000 in surprise repairs later.
Immediate Savings: Low-Cost Updates That Pay Off Fast
Some of the best renovation ideas for old homes are small, targeted changes that reduce bills right away without altering the home’s character. These are ideal first steps if your budget is limited.
1. Air sealing and basic insulation
- What it is: Sealing gaps around windows, doors, baseboards, and attic access; adding weatherstripping and door sweeps; topping up attic insulation in key areas.
- Upfront cost: $150–$800 for materials and basic labor, depending on home size.
- Monthly savings: $20–$80 on heating and cooling bills.
- Payback period: Often 1–3 years, sometimes less in very drafty homes.
This preserves original windows and doors while making the home more comfortable and cheaper to run.
2. Smart thermostats and simple HVAC tuning
- What it is: Installing a programmable or smart thermostat and having your existing furnace or boiler cleaned and tuned.
- Upfront cost: $150–$500 for thermostat and basic service.
- Monthly savings: $10–$40, depending on climate and current usage.
- Payback period: 1–3 years.
This upgrade is invisible to the home’s character but can significantly cut energy waste.
3. Low-flow fixtures and leak fixes
- What it is: Replacing showerheads and aerators with low-flow models, fixing running toilets and dripping faucets.
- Upfront cost: $50–$300 for parts; more if you need a plumber.
- Monthly savings: $5–$30 on water and energy (for hot water).
- Payback period: Often under 1 year.
These changes don’t alter the look of the home but can reduce both water and energy bills.
4. Strategic painting and light updates
- What it is: Painting walls and trim, updating light fixtures, and adding LED bulbs.
- Upfront cost: $200–$3,000 depending on DIY vs pro and home size. For planning, see the interior painting cost guide.
- Monthly savings: $3–$10 from LED lighting; the main benefit is improved appearance and resale appeal.
- Payback period: LEDs pay back in 1–2 years; painting pays back mainly when you sell or rent.
Painting and lighting are low-risk ways to modernize the feel of an old home while keeping original details like trim and doors.
Long-Term Savings and Smart Upgrades
Once safety and basic efficiency are under control, you can plan larger projects that modernize your home and reduce long-term costs while respecting its character.
1. Window and door strategy: repair first, replace selectively
- What to do: Restore original wood windows where possible (weatherstripping, storm windows) and replace only the worst units. Upgrade exterior doors to energy-efficient models that match the home’s style.
- Upfront cost:
- Window restoration and storms: $300–$800 per window.
- Full replacement windows: $600–$1,500+ per window.
- New exterior doors: $800–$3,000+ installed; see the exterior doors guide for options and costs.
- Monthly savings: $20–$80 on energy bills for a typical home, depending on climate and current condition.
- Payback period: 10–20 years for full replacements; 5–10 years for restoration plus storms.
In many older homes, restoring and sealing original windows plus adding storms is cheaper and more in character than full replacement, with similar comfort gains.
2. HVAC replacement and zoning
- What to do: Replace very old furnaces or boilers with high-efficiency models, or add ductless mini-splits for targeted heating and cooling.
- Upfront cost: $4,000–$15,000 depending on system type and home size.
- Monthly savings: $40–$150 on energy bills in many older homes.
- Payback period: 7–15 years, shorter if your current system is very inefficient.
These upgrades are mostly hidden and don’t affect the home’s historic look, but they greatly improve comfort and operating costs.
3. Electrical and plumbing modernization
- What to do: Upgrade old panels, add grounded outlets, replace dangerous wiring, and gradually replace failing pipes.
- Upfront cost:
- Panel upgrade: $1,500–$4,000.
- Whole-house rewire: $8,000–$20,000+.
- Plumbing updates: $2,000–$15,000+ depending on scope.
- Monthly savings: Small direct savings; the main benefit is avoiding emergency repairs and damage.
- Payback period: Best viewed as risk reduction rather than bill savings.
These upgrades protect your investment and make it safer to add modern appliances and technology without overloading old systems.
4. Exterior protection: roofing, gutters, and paint
- What to do: Maintain or replace the roof, install or upgrade gutters and downspouts, and keep exterior paint or siding in good condition.
- Upfront cost:
- Roof replacement: $7,000–$20,000+ depending on size and materials.
- Gutters and guards: $1,000–$4,000; see the guide to gutter guard systems for options and pricing.
- Exterior painting: $3,000–$10,000+; see the exterior painting cost guide.
- Monthly savings: Indirect; mainly prevents water damage and preserves value.
- Payback period: Best measured in avoided repair costs over 10–20 years.
These projects protect original details like wood siding, trim, and windows, which are expensive to replace if they rot or fail.
When Spending More Now Saves You Later
Some higher-cost choices in an old-home renovation can actually reduce your total spending over 10–20 years. The key is to know when a more durable or efficient option is worth it.
Examples where higher upfront cost can be smart
- Quality roofing and flashing: Spending an extra $2,000–$5,000 on better materials and installation can prevent tens of thousands in water damage to walls, ceilings, and original woodwork.
- Proper drainage and grading: Reworking grading, adding drains, or improving gutters may cost $1,000–$8,000 but can prevent foundation issues and basement water problems.
- Lead and asbestos remediation: Professional removal is expensive but protects health and avoids legal and resale issues.
- Energy-efficient systems: Choosing a more efficient furnace, boiler, or heat pump can add $1,000–$3,000 upfront but save $20–$80 per month in energy.
These are areas where “cheap now” often means “expensive later,” especially in older homes with more vulnerable materials and finishes.
Common Costly Mistakes in Old-Home Renovations
Renovating an old home has unique risks. Avoiding a few common mistakes can save thousands and help you keep the home’s character intact.
1. Removing original features too quickly
- Ripping out original wood floors, trim, doors, or built-ins can reduce the home’s charm and resale value.
- Refinishing or repairing these elements is often cheaper than replacing them with new materials of similar quality.
2. Skipping permits and inspections
- Unpermitted work can cause problems when you sell, and may need to be redone to meet code.
- Hidden issues (like undersized beams or unsafe wiring) can go unnoticed until they cause damage.
3. Over-insulating without ventilation
- Sealing an old home too tightly without proper ventilation can trap moisture and damage original wood and plaster.
- Balance air sealing with controlled ventilation to protect both comfort and materials.
4. Ignoring water issues
- Painting over damp walls or finishing a wet basement without fixing the source of moisture leads to mold and repeated repairs.
- Always solve the water problem first, then renovate finishes.
5. Underestimating total project cost
- Older homes almost always have surprises behind walls and floors.
- Plan for a 10–20% contingency in your budget to avoid running out of funds mid-project.
When to Hire a Professional Instead of DIY
DIY can save money, but in older homes, some projects are risky to tackle without experience. Knowing when to bring in a pro can actually reduce your total costs by avoiding mistakes and rework.
Jobs that usually require a professional
- Electrical work: Panel upgrades, new circuits, and rewiring should be done by a licensed electrician for safety and code compliance.
- Major plumbing: Replacing main lines, moving fixtures, or dealing with severe leaks is best left to a plumber. For cost expectations in emergencies, see the emergency plumbing cost guide.
- Structural changes: Removing walls, altering beams, or changing staircases requires engineering and permits.
- Roofing and high exterior work: Safety risks and leak potential make professional installation worth the cost.
- Lead and asbestos removal: These materials require special handling and disposal.
Good candidates for DIY or handyman help
- Painting, basic trim repair, and simple flooring projects.
- Installing weatherstripping, door sweeps, and caulking gaps.
- Replacing light fixtures (if wiring is modern and circuits are not overloaded).
- Minor carpentry and hardware upgrades.
For help deciding between doing it yourself, hiring a handyman, or bringing in a specialist, you can review the handyman cost guide and the article on DIY vs hiring a professional for home repairs.
Decision Guide: Do Now vs Later, DIY vs Pro
Use this section to prioritize your renovation ideas and choose the most cost-effective approach for your old home.
What to do now vs later
- Do now (high priority):
- Fix active leaks, roof issues, and drainage problems.
- Address electrical and plumbing safety hazards.
- Seal major drafts and add basic insulation in the attic.
- Remediate mold, lead hazards (especially with children), and asbestos risks.
- Do later (lower priority):
- Full kitchen and bathroom remodels if systems are functioning.
- Layout changes and additions.
- High-end finishes and custom built-ins.
Quick fix vs investment
- Quick fixes:
- Weatherstripping, caulking, and door sweeps.
- LED bulbs and basic fixture swaps.
- Cosmetic painting and minor repairs.
These are ideal if you plan to move within 3–5 years or have a tight budget.
- Investments:
- HVAC replacement, major insulation, and window restoration.
- Electrical and plumbing upgrades.
- Roofing, gutters, and exterior protection.
These make more sense if you plan to stay at least 7–10 years or want to protect long-term value.
DIY vs professional
- Choose DIY when:
- The work is low-risk (painting, simple carpentry, basic weatherproofing).
- You can follow clear instructions and have the right tools.
- Local codes don’t require a licensed pro.
- Choose a professional when:
- Work involves electrical, gas, structure, or complex plumbing.
- Permits and inspections are required.
- Errors could cause major damage or safety issues.
Cheap fix vs full upgrade
- Cheap fix is enough when:
- The issue is cosmetic (scratched floors, dated paint colors).
- You’re planning a larger renovation in a few years and just need to “hold over.”
- The system is old but safe and functional.
- Full upgrade is better when:
- Repairs are frequent and adding up (constant furnace or plumbing calls).
- There are safety concerns or code violations.
- You’re opening walls anyway, making upgrades cheaper now than later.
Frequently Asked Questions
How much should I budget to renovate an old home without gutting it?
For a light-to-moderate renovation that keeps most of the layout and original features, many homeowners spend 10–25% of the home’s value over several years. Focusing first on safety, water management, and energy efficiency can stretch your budget further and avoid surprise costs. Always add 10–20% for unexpected issues in older homes.
What renovation gives the best return in an old house?
Improving energy efficiency (air sealing, insulation, and HVAC upgrades) often delivers the best financial return through lower monthly bills and better comfort. Preserving and refinishing original wood floors, trim, and doors can also add strong resale value at a relatively low cost. Full kitchen and bath remodels can pay off, but only when systems underneath are sound.
Is it worth replacing old windows, or should I restore them?
In many older homes, restoring solid wood windows and adding storm windows is cheaper and more in character than full replacement, with similar comfort and energy savings. Full replacement makes more sense when windows are badly rotted, don’t open or close properly, or are beyond repair. Compare quotes for both options and consider how long you plan to stay in the home.
How can I modernize my old home on a small budget?
Start with low-cost, high-impact projects: weatherstripping, caulking, LED lighting, smart thermostats, and fresh paint. Focus on one room at a time, keeping original details and updating only what’s necessary. This approach can cut bills by $30–$100 per month while gradually improving comfort and appearance.
When are renovations not worth the cost in an old house?
Renovations are often not worth it when they over-improve the home for the neighborhood, require major structural changes with limited benefit, or erase valuable original features. If the cost of fixing structural, foundation, or extensive water damage approaches or exceeds the home’s value, it may be better to scale back plans or reconsider the project entirely.
How do I avoid unexpected costs when renovating an old home?
Get thorough inspections, open up small test areas before committing to big projects, and insist on detailed written estimates. Prioritize fixing known issues (water, structure, electrical, plumbing) before cosmetic work, and keep a 10–20% contingency fund. This reduces the chance of mid-project surprises that blow your budget.
Summary and Next Steps
Modernizing an old home without losing its character means upgrading what you can’t see (safety, structure, and efficiency) while preserving what you can (floors, trim, windows, and layout). By tackling water management, insulation, and basic system upgrades first, many homeowners save $50–$250 per month and avoid large emergency repairs.
Next, create a simple plan: list safety and water issues, set a realistic budget with a contingency, and prioritize projects that reduce monthly costs or protect original features. Decide what you can safely DIY and where a professional will save you money in the long run. With a clear order of operations and a focus on both savings and character, you can enjoy a comfortable, efficient home that still feels true to its history.